Showing posts with label Decorating. Show all posts

20 November 2015

Updating the spare room

Before all the crazy started, I got the spare room "done for now". And no sooner had I taken the photos did we have all the furniture moved out and our living furniture moved in to make a den of sorts while our living room is out of commission. As soon as the new floors are in, I'll be putting all the furniture back so the work wasn't lost.

Let's start with a before, shall we? Boring beige walls, like everywhere else in the house, a twin bed, and not much else. It needed some TLC.

Before picture

As soon as I had the first coat of paint on, I knew I was in love. It's so warm and rich and darker than I would usually go for. It's Para Lifestyles Film Festival. This room is incredibly bright and I knew it could handle it.

1st coat of paint

The only new thing I purchased for this room was the desk chair, for a total of $3 at the thrift store. I was originally going to paint whatever chair I bought red, but I kinda liked the blue once I got it home. It's in rough shape, but so is the desk that I dug out of my parents storage room. We got a new mattress for our bedroom so we put our old one in here. This room will hopefully be a nursery some day, so there wasn't much point in investing a lot of money in it.

Second bedroom after

Other side of spare room

Chest of drawers beside the bed

Ignore the dust and fingerprints on my laptop in this picture (and the old walnut chair borrowed from the keyboard in the living room). I didn't notice it until I uploaded everything, but I love how the photo shows the light that streams into the room in the afternoon.

Close up desk top

Yep, I think it's all quite an improvement from where we started. I love it!

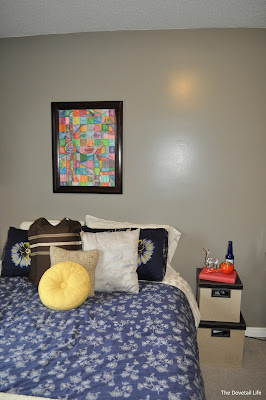
Artwork over bed

16 November 2015

Handmade curtains

I went on a bit of a curtain-making spree.

After we'd been in the blue house a couple of months, I was pretty fed up with the lack of curtains/ugly curtains that covered our windows. I spent a week or so scouring the internet and local stores for something I loved that was reasonable quality but didn't cost 6 arms and 4 legs. We need approx. 90 inch curtains for the bedrooms which means buying the 96 inchers and shortening them. Those extra 12 inches seem to add a crazy amount to the cost.

So, to the fabric store I went! I actually went in there on a mission for material for dining room curtains, but came home with material to make new ones for the office as well.

I started on the dining room ones first. I knew I bought just enough fabric to make 2 panels, so I cut it in half and got to work ironing the sides. I had 1.5 (of 4) sides sewn when my machine started making...questionable noises. And it only got worse. So, in for servicing the machine went putting my curtain making project on hold for about 2 weeks.

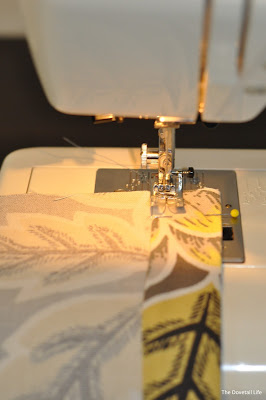
Sewing the dining room curtains

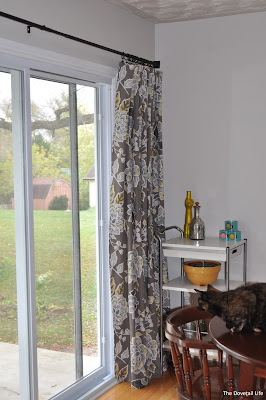
But, never fear, I got it back and got them done. And I'm in love! They're just perfect. I'll probably hang a different rod in there at some point in the future, and I've left a large hem allowance to lengthen the curtains at that time if need be.

Dining room curtains

Dining room curtains

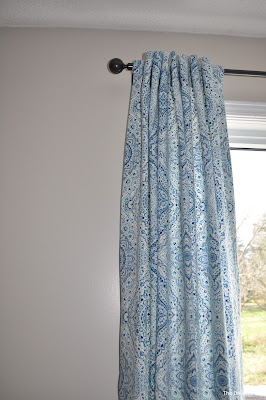
Once I got my machine back I also made curtains for the office. You knew I had a general disdain for the ones that came with the house, and I think these blue and white patterned ones are definitely much better! These have tab backs and were a lot more work than the dining room curtains as a result. I was trying to be thrifty with these (the material was on sale) so I didn't want to buy drapery clips, but I think it would have been worth it for the amount of time it would have saved. It's just so much easier!

New office curtains

New office curtains

There's nothing scientific about making curtains for me. Each panel is as wide as the drapery fabric came. Ironing everything is key. I sew the sides up and then sew the top, based on how I plan to hang them. I hang up a panel, pin where it needs to be hemmed and take it down. Then I measure it so I can get a straight hem and sew the other panel the same length as well.

It's a really easy DIY as long as you have a bit of extra material to play with for the length, and while it won't save you a ton of money (unless your material is on sale), it does provide you with a lot more options which is really what it came down to for me this time.

29 September 2015

Phase 1 office reveal

Now, I'm going to preface this post by saying: the office is one of the plainest rooms in our home. It's Justin's space, and he could not care less about decoration in there. But, that doesn't mean I couldn't inject a bit of life into an otherwise beige box. It's the first room in the house that feels somewhat pulled together, and for that, I am very grateful.

Here's where we started:

Office before

Office before

Not great. Very blue. Up close, the walls were...not pleasant. This had been a nursery for the previous owners, and I prefer not to think about what was on there. They were also in terrible condition - nails and screws and holes and peeling paint galore. So, step 1 was paint the place. It's Para Lifestyles Comfortable Chinoise. It's the paint we used in our last house, which means this little update was a freebie. 


Remember, we're leaving the trim and doors as-is for now since we'll be replacing them along with the rest of the trim and doors in the house within a couple of years. It's not cute, but I'm not wasting my time temporarily fixing it. Painting baseboards against carpet = the worst. If you're wondering about the too-short curtains in the progress photo above, I've already addressed that little oops

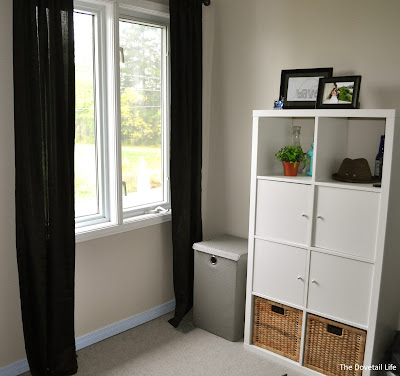
Once it was painted, the fun could begin. I was working with what we already had. We didn't buy any new furniture (with the exception of the hamper), which meant sticking with the black, white, and light wood we had in our old office. I tried to use blues here and there to add colour without competing with the trim. 


These are some of my favourite things in the room:

The hat belonged to Justin's grandfather and was given to us by his mom a couple of years ago. The blue beer bottle is from a brewery we visited on our honeymoon - QidiVidi


This tape measure was gifted to Justin from one of my uncles. It belonged to his father-in-law, and I think it's super cool (Justin just thinks it's practical). 


I hung a picture of each of our pets when they were babies above the dresser. This may be my favourite detail of all, since I see it every time I walk past the room. 


I am still working on the curtain situation. I don't love these black ones: they're flimsy and I think they look cheap. I bought some great blue and white patterned canvas on sale on the weekend, but while I was sewing the machine started making the worst noise, so I've had to take it in for service (womp womp). 


Overall, I am really loving this room right now. It looks a bit empty in photographs, but in person, it's a really comfortable work space which is really all we can ask for. 

26 August 2015

A memory-filled gallery wall


In our first house, I struggled endlessly with what to do with the big wall in the dining room. It was an awkward wall with some weird bulkheading going on so it didn’t really have a defined middle. This past winter, I finally figured it out and hung a gallery wall with pictures of favourite memories:

Old house gallery wall

I loved that wall. My chair in the dining room faced it and there was a good view from the kitchen. It felt very home-y, but modern at the same time, which was exactly what that house needed. When we moved, I took it down without really knowing whether there would be a place for it in the new house (*tear*).

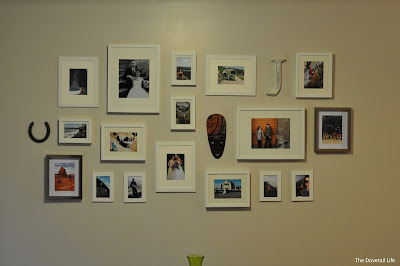
After we painted the dining room, it started to feel a lot more like our old dining room, and I started to feel like the gallery wall would work in there. Justin didn’t believe me, but I was convinced and hung it anyway while he wasn’t home. And wouldn’t you know, we both love it!

New gallery wall

I expanded it a bit for this house by adding the nickel frames that tie in with some artwork we have on the wall across from it and the mirror hanging in the living room. I also changed out a few of the photos.


It takes a couple of hours to hang, but here’s how I tackle it:
-          Frame all of your pictures first
-          Lay the frames out on a surface similar in size to your wall (I use the dining room table, which is a bit small)
-          Cut out pieces of paper the right size for each and every frame (I use old flyers…)
-          Starting from the middle, tape the paper guides to the wall with roughly measured spacing (tip: if it’s a freshly painted wall, use delicate surface tape)
-          Once you’re happy with your placement, you can start hanging the frames over top of your paper guides (this is where I get out my ruler and level to make sure everything is spaced and hung neatly)
-          Pull the guides out from under your pictures once you’re done

Laying out the gallery wall

Hanging the paper guides for the gallery wall

We are completely smitten with this wall (and so is our kitty, Peanut Butter)! So many wonderful memories.

Peanut Butter the cat sitting in front of the gallery wall