One of the things we’re doing that I didn’t mention in my initial post about the upcoming renos is painting the ceiling. It was kind of an after-thought, to be honest. I’ve hated the ceiling since day 1, but Justin kind of likes it. Scraping all that plaster would be a bear of a job, and drywalling over it would be expensive and lower our ceilings a bit, so Justin won this one and it’s staying (for now). Painting it was also a lot of work, but considerably cheaper and easier than the other options. It also covers up the years of grime that have accumulated up there since you really can't clean textured ceilings. The general dirty look is one of the biggest reasons I hated the ceiling so much.
Now, if we were smart, we would have painted the ceiling BEFORE we painted any of the walls. But clearly that didn’t happen, so we had to protect the walls before we could paint. The floor didn’t matter, except for the stairs and landing, since we're down to subfloors right now anyway. I’d say it’s probably prudent to protect the walls no matter what if you’re painting a textured ceiling. It requires such a thick roller that the paint kind of flies around. There was a fine mist of white paint covering everything when we were done, and you don't want that on your walls.
To protect the walls, we started by running a line of tape along the top. We used delicate Frog Tape for the walls that have been more recently painted just to be safe, and regular Frog Tape for the walls that haven’t been painted yet.
Then, we taped plastic sheeting to the tape line to protect the walls. The reason we didn’t just go straight to that step is that we knew it would be harder to tape the plastic in a neat, straight line up against the ceiling.
The plastic static-ed itself to the wall well enough that in most places, I didn't bother taping the bottom. It wasn't flying around at all.
We protected the walls the day before we painted, so I cut the doorways out and taped the plastic to itself so we could get in and out. When it came time to paint, it was easy to take the tape off and let everything fall back down. This super-terrible cell phone pic shows kind of what things looked like:
Right before we painted, we tackled the stairs and landing. The plastic is slippery so we didn't want to be walking on it for any longer than possible.
The very last thing we did was take down the light fixtures. I bagged the dining room one, but it really wasn't necessary so I left the hallway ones alone. It was nice to be able to leave them on and take advantage of the light since we were painting in the evening.
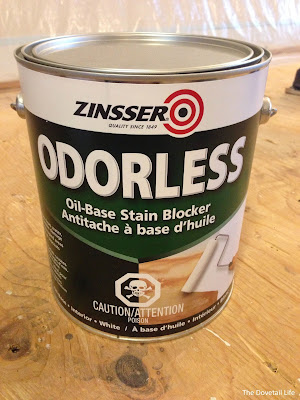
Finally, after all that, it was time to paint! We used Zinsser Odorless Oil-based stain blocker and primer, which can be used without a top coat as a ceiling paint as well #winning. The downer was that it wasn't really odorless, which was to be expected really. It could have been much worse.
We went with oil-based since we’re not sure what type of finish is on the ceiling now, and we know it will stick to anything. I bought a brush specifically for oil-based paints, and we used a ¾ nap roller. I did the cutting in, and Justin did the rolling. The key thing here is that once you’ve painted an area, you can’t go back over it otherwise you risk pulling the texture down.
I did the cutting-in through the day and Justin rolled that night. You can see what a difference it made, pretty much immediately:
We only ended up doing 1 coat on the main ceiling, but I did the edges twice. The paint didn't go on quite as thickly with the brush, so you could see where the roller had gone over top of it after the first coat. The second coat fixed that right up.
The difference is absolutely incredible! The ceiling is so bright! I think once the darker floors and chunky white baseboards are in it's going to look really good.
Admittedly, we still haven't done the part directly over the landing - Justin left the tall step ladder at work, so that will be a project for this coming weekend. I'll show you pictures of the whole thing once it's totally done. It really never ends... but this is the first major step towards getting this reno done, and if anything, we're even more excited now!


No comments:
Post a Comment